My Favorite Coconut Cake
Last Updated on November 3, 2021 by Anna Baumann
I love baking! It’s so satisfying to create something from scratch. You start off with a bunch of ingredients and some empty bowls and, POOF! Sweet happiness! This recipe is for my favorite coconut cake!
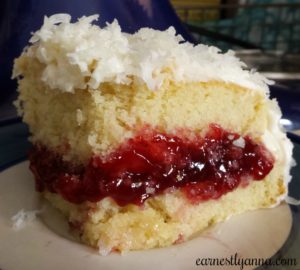
Coconut is one of those things that people either love or hate. I love it! I usually make this with raspberry filling because my family thinks it tastes like a Hostess Zinger. But you can use any filling you like. That’s one of the great things about this recipe. It would taste amazing with pineapple, strawberry, blueberry, custard or anything else you can come up with.
If you make it please tell me what you think!
Cake
- 1 cup butter, softened
- 4 cups all purpose flour
- 2 tablespoons baking powder
- 1 teaspoon salt
- 2 1/2 cups sugar
- 5 eggs
- 1 3/4 cup coconut milk
- 1 teaspoon vanilla extract
- 1 teaspoon almond extract
Filling
- 2 cans (Solo) raspberry cake and pastry filling
Frosting
- 3/4 cup butter, softened
- 1 1/2 cups shortening
- 2lb bag of powdered sugar
- 2-3 teaspoons vanilla extract
- 2-3 teaspoons almond extract
- 1/2 cup coconut milk
Topping
- 2 cups flaked coconut
Instructions for cake
- Pre-heat oven to 350.
- Butter and flour a 13x9x2 pan
- Beat together butter and sugar. Add eggs and mix well.
- Combine flour, baking powder and salt. Add to butter mixture and beat together.
- Add milk and extracts and beat until everything is completely combined.
- Pour into prepared pan and bake for 40 minutes or until golden brown and set. (Use the toothpick test to be sure the center is cooked.)
- Cool completely before inverting onto serving platter.
Instructions for frosting
- Beat together butter and shortening until completely combined.
- Add coconut milk and extracts, mix well.
- Gently mix in powdered sugar and beat until fluffy.
- Once you’ve filled and frosted the cake, sprinkle coconut generously over the top and sides.
Tips for assembly
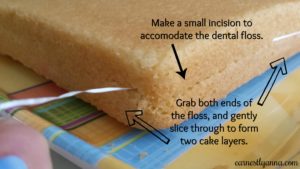
I have a fancy cake layer cutter. But I prefer the dental floss method!
- Make a small slice where you’d like to separate the cake into two layers.
- Pull off a long string of dental floss. Use something strong like Glide or Satinfloss.
- Grab both ends of the floss and carefully slice the cake into two layers.
- I separate the layers using a Wilton Cake Lifter. Best 8 bucks you will ever spend! Just gently slide the cake lifter under the top layer, and place it out of the way while you prepare the bottom layer.
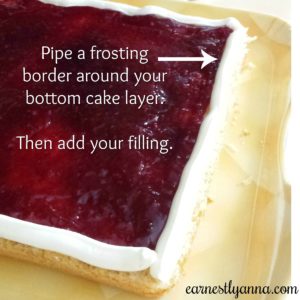
- To prevent your filling from spilling out the sides, pipe a border of frosting around the bottom layer. Once your filling is in place, replace the top layer and frost away!

